English Toffee

I love making candy, to the point that Kenny is actually asking me to maybe slow down the production line a little until he can get a little exercise in. I did at least get in a couple trays of English Toffee before the cessation of production.

As anyone who as attempted to boil down sugar knows candy can be tricky. Humidity levels, rouge sugar crystals and the wrong temperature levels can shut down the whole production. I have discovered a few tricks that make things a little bit easier. So bust out your candy thermometer and heavy bottomed sauce pan and lets get to candy making.

English Toffee

1 1/2 cups salted butter

2 cups granulated white sugar

1/4 cup water

3 tablespoons light corn syrup

1 teaspoon pure vanilla extract

1/2 teaspoon salt

12 ounces milk or semisweet chocolate chips

Chopped pecans or almonds (optional)

I prefer to line a 11 x 17 inch baking sheet with tinfoil first and then butter it well. The foil makes it easy to lift out the candy.

Melt the butter in a large heavy saucepan over a low to medium heat. While the butter is melting, in a bowl combine the sugar, water and corn syrup.

Once the butter is fully melted add the sugar, water and corn syrup. Constantly stir over medium heat until the sugar has completely dissolved and the mixture comes to a boil, once it is fully rolling, stop stirring and remove from heat. Rinse off any sugar crystals clinging to the sides of the saucepan with a pastry brush dipped in water. It is important to make sure that the sides are completely clean.

Clip a candy thermometer to the side of the saucepan and cook, without stirring, until the mixture reaches the hard crack stage, 300 degrees F. If you find the sugar syrup browning unevenly, swirl the saucepan gently from time to time. I have found that slow and steady is the trick here. Be careful not to have the heat too high or it will burn before you reach the hard crack stage.

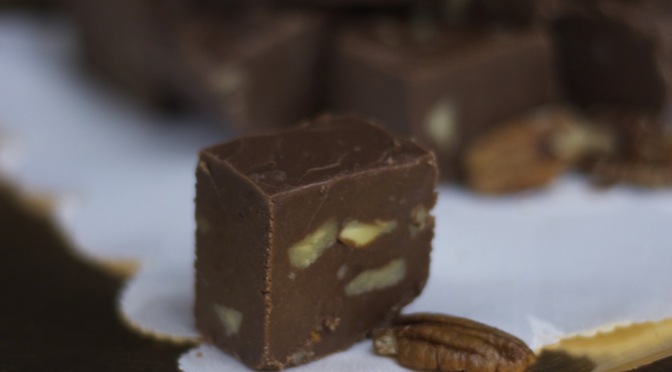
Immediately remove the saucepan from the heat and stir in the vanilla extract and salt. Quickly pour the toffee in an even layer on the prepared baking sheet. Sprinkle the chocolate chips over the hot toffee. After a few minutes the chocolate will be melted enough to spread with an offset spatula in an even layer over the toffee. Sprinkle the the top of the toffee with chopped pecans or almonds if so desired.

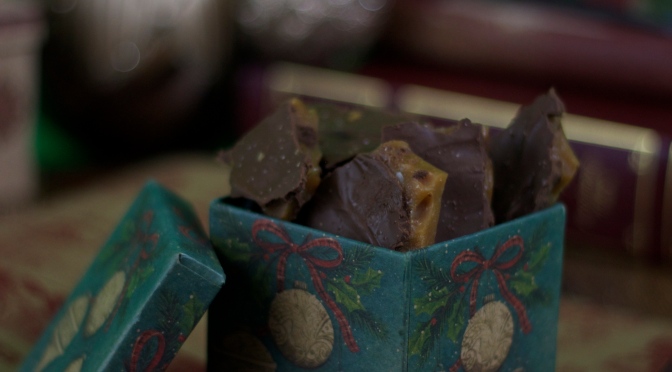
Cool completely, either at room temperature or in the refrigerator, and then break into irregular pieces.

If you can manage to avoid eating all of it, the toffee can be stored in an airtight container at room temperature, for about 7-10 days but seriously who holds onto toffee for that long?

Roux

Roux is the base for cream soups, thickened sauces like the kind used for enchiladas or gravy. Basically it is a quick and easy way to thicken up a liquid. There are many variations available but this is my tried and true method.

Roux

2 tablespoons butter
3 tablespoons all-purpose flour
1/2 cup chicken broth
1/2 cup milk
salt
pepper

In a Pyrex measuring cup add chicken stock and milk and set aside.

Melt butter in a medium saucepan. Add flour and whisk quickly until well incorporated.

Add all of the milk, stock combo in small amounts whisking constantly to keep mixture smooth. Add salt and pepper to taste and over medium heat bring to a boil whisking constantly.

Cook until thickened and add to your favorite soup, gravy or other sauce that needs thickening.

Cream of Asparagus soup with Crunchy Parmesan Asparagus Croutons

So I have been promising Kenny that we could try meatless meals on occasion. It is very much against my nature but I am of the obliging sort. We had an abundance of asparagus that needed to be used and I wanted to try something new. So I dug around online looking for a cream of asparagus recipe that caught my attention. I was disappointed in my search. So I decided to make something up instead.

It turned out quite delicious and though it is technically meatless I did use chicken stock. I am sure vegetable stock would work as well I just didn’t have any on hand.

I was pleasantly surprised with this one so If you want to try something new give this one a spin.

Cream of Asparagus Soup

1 lb asparagus rinsed and cut in 1 in pieces
3 cups chicken stock
3 cups water
1 package Knorr vegetable soup mix
2 cups roux
1/8 cup cream cheese
1/4 teaspoon beau monde
salt
pepper

In a large pot add chicken stock water Knorr vegetable soup mix and asparagus. Bring everything to a boil and let it cook until asparagus is fork tender. Strain asparagus from liquid conserving the liquid in a large bowl. Add drained asparagus and vegetable soup mix pieces to a blender with a cup of the reserved liquid and blend to be until no chunks are left. Pour contents of blender through a screen to strain out any remaining fibers. Add reserved liquid and bring to a boil. Then add cream cheese, roux and beau monde and whisk until everything is well incorporated and smooth.

Let simmer until slightly thickened. Top with asparagus croutons.

Parmesan Asparagus Croutons

2 cups rinsed asparagus cut into 1 in pieces.
2 egg whites
1tbs. mayonnaise
1/2 cup Parmesan
1cup panko
1 cup italian bread crumbs
salt
pepper

In a large ziplock bag mix Parmesan Panko Italian breadcrumbs and salt and pepper mix well. In a separate bowl add egg whites and mayo and whisk until smooth.

Coat asparagus pieces in egg wash. Transfer asparagus into breadcrumb bag and toss until well coated.

Using your hands scoop asparagus out of breadcrumb mixture and sift through fingers to remove excess breadcrumbs. Place on wire rack lined backing sheet.

Lightly drizzle asparagus with olive oil and bake at 425° for 15 minutes.

Pumpkin Roll with Maple Cream Cheese

Lets start with Pinterest is evil, but also the greatest good I have ever known. I find recipes that I would never have come across without it but in turn I have to try said recipes which, greatly expands my recipe base, in addition to my personal base.  Last year at Thanksgiving Kenny pulled up a recipe for Pumpkin Roll with Maple Cream cheese filling. I’ll eat a boot if there is cream cheese on it so I was in, even though I had never made a rolled cake before. It wasn’t to terribly difficult despite what I had heard and this darling little log of perfection became a seasonal stable. Once the leaves begin to fall I hear weekly if not daily a pleading cry for the pumpkin roll.

If you are going to make this recipe just be sure to prep your supplies and be free from distraction. Rolling cake isn’t difficult as long as you aren’t juggling a half dozen other things at the same time.

Pumpkin Roll with Maple Cream Cheese Filling

1/4 cup powdered sugar, to sprinkle on towel
3/4 cup all purpose flour
1/2 tsp baking powder
1/2 tsp baking soda
2 tsp ground cinnamon
1/2 tsp ground nutmeg
1/4 tsp ground cloves
1/4 tsp allspice
1/4 tsp salt
3 large eggs
1 cup granulated sugar
1 tsp pure vanilla extract
2/3 cup pure pumpkin pureé,

Filling 

8 ounces cream cheese, softened
1 cup powdered sugar, sifted
6 tbsp butter, softened
2 tbsp pure maple syrup
1 tsp salt

Preheat oven to 375 degrees.

Grease 15x10x1-inch jelly-roll pan and line with parchment or waxed paper. Grease and flour paper and set aside. Lay out a clean, smooth kitchen towel and sprinkle with powdered sugar. Be generous with the sugar as this will keep the cake from sticking to the towel.

In the bowl of an electric mixer, beat eggs and sugar on medium high speed until pale yellow. Add pumpkin and mix.

In a separate bowl, sift flour, baking powder, baking soda, cinnamon, cloves, and salt.

Add the dry ingredients to the pumpkin mixture on low speed until combined.

Pour cake batter onto prepared jelly roll pan evenly. I gave the pan a few firm taps on the counter to help it level out.

Bake for 11-14 minutes.

To test for doneness, gently press the center of the cake. If it is done it will spring back.

Remove from the oven and invert the cake onto the prepared kitchen towel. Carefully peel away the wax paper.

Starting from the short end of the cake, gently roll the cake up in the towel and allow to cool while you make the filling.

Filling

Beat cream cheese, powdered sugar, salt and softened butter on low speed until smooth.

Add maple syrup and heavy cream and beat on high speed until fluffy. At this point give the filling a taste. I like a rich maple flavor so I gradually added more syrup until it reached my preferred level of maple-ness.

Gently unroll cake.

Spread cream cheese mixture over cake and re-roll.

I have found that to keep things round and pretty it is good to wrap in plastic food wrap and chill for several hours. This will set up the cake and the cream cheese nicely and make for a better structure.

At this point chose a pretty garnish and presentation. I like to slice the end off to present a clean edge and sometimes I will slice a couple of pieces with a thick thread or unflavored dental floss . Dust your cake with powdered sugar or drizzle a little maple syrup across the top. Whichever you prefer I am sure it will be a hit.

The secret to perfect fudge

Rich, velvety and decadent fudge had been a holiday staple for generations. Every year I am flooded with requests for my recipe for it seems that many are vexed with a fudge that doesn’t turn out quite right. What I have discovered is that it isn’t the recipe so much as it is the technique that matters. Today I will share will you my “secrets”.

One thing to remember about candy making is that it cannot be rushed but you also must be attentive and ready to work fast. Also be mindful that sugar can be temperamental. One rouge crystal can cause a chain reaction that will ruin the whole pot.

Here is my process along with a few techniques that can help you avoid disasters.

Fantasy Fudge

3 cups sugar
3/4 cup butter plus a few pats for pans
2/3 cup evaporated milk
12 oz semi sweet chips
1 jar (7 oz.) marshmallow creme
1 cup chopped Pecans
1 1/2 tsp. vanilla
1tsp. salt

Butter the bottom and sides of a heavy sauce pan. Line a 9×9 baking dish with foil and generously butter it too.

Add sugar, butter, and evaporated milk to the sauce pan and bring to a boil over medium heat stirring frequently. If any sugar crystals splash up on the sides of the pot just give them a little rinse with a pastry brush and water. Once a full rolling boil is achieved insert a candy thermometer and stir constantly until the thermometer reads 234°. Remove from heat.

Add chocolate, vanilla, salt, and marshmallow cream and beat with a mixer until the mixture has developed a shine. At this point fold in chopped pecans if desired and the pour mixture into the prepared 9×9 pan.

Let cool until set, preferably overnight, if you can wait that long. Once set up, enjoy the best fudge you have ever made.

Ginger Snaps

I love Ginger Snaps. Something about them just screams holiday to me. Though to be honest I wouldn’t turn one down any time of the year. When I was trying out this recipe I had a few friends cringe slightly when I mentioned them. Apparently the only ginger snap many have had are the tooth shattering variety that come out of a box. This recipe is anything but. Soft and chewy, they are cookie perfection. I challenge anyone who isn’t sure about a ginger snap to give these a try. I have a feeling you will be pleasantly surprised.

Ginger Snaps

Cream Together:

1 1/2 cups shortening
2 cups brown sugar
1/2 cup molasses
2 eggs

Sift Together
1 teaspoon salt
2 teaspoon ginger
2 teaspoon cinnamon
1 teaspoon cloves
3 teaspoon baking soda
4 1/2 cups flour

Once the sugars and shortening smooth incorporate the dry ingredients. Roll into a ball about the size of a walnut. At this point you can roll each cookie in granulated sugar as I prefer to do or you can bake them without. Place about an inch apart on a cookie sheet.

Bake at 375° for 8-10 minutes

Take them out before just they look done and move them quickly to a cooling rack to ensure they are soft and chewy. If you like them with a little more snap then take them out right as a golden browning has started and let them cool on the cookie sheet.

Crockpot Chicken Tikka Masala

I love indian food but have been too intimidated to try to make any of it because I was sure that I would need spices and tools that I wouldn’t be able to find easily. Eventually my cravings forced my hand and I started researching my favorite recipes. What I discovered was the recipes are surprisingly simple albeit chock full of ingredients. Some, like many ethnic dishes, can be quite time consuming which does not do well for a busy household. I was delighted when I found a slow cooker recipe for my favorite Indian dish and even happier when it turned out to be delicious. So get out the crock pot and open up that spice cupboard cause this one has a lot of ingredients but they are all totally worth it.

Slow Cooker: Chicken Tikka Masala

3 lbs chicken breast cubed
1 large onion diced
4 cloves garlic minced
28oz tomato puree
1 1/2 cups plain yogurt
2 tbsp. olive oil
2 tbsp. garam masala
1 tsp. turmeric powder
1/2 tsp. paprika
2 tsp. salt
3/4 tsp. cinnamon
3/4 tsp. black pepper
1-3 tsp. cayenne pepper. (I found that 1 1/2 tsp was right on the edge of just spicy enough / I might regret this later)
2 bay leaves
1 cup heavy cream
3 tbsp. cornstarch
chopped cilantro

Directions:

Combine everything from onion to cayenne pepper into the slow cooker and mix well. Add chicken and toss to coat. Add bay leaves and set slow cooker to low for 8 hours, or high for 4.

Once done combine cream and cornstarch in a separate bowl and mix well. Add to slow cooker and mix well. Cook for an additional 20 minutes to thicken up.

If desired squeeze half a lemon over the the mixture and serve over a bed of hot basmati rice, top with cilantro if you would like or just be a heathen and dig in like we did.

Finding spices like garam masala isn’t to terribly difficult especially if you have a good distributor. The Spice Outlet is a little brick and mortar shop that I love. Their e-commerce site isn’t fully functional yet but keep checking back, they are totally worth it.

For the original recipe check out Table for Two.

Photography Friday

If you use a digital camera, whether it be a Cannon, Nikon, etc.  Here are a few tricks for when shooting outside:  to get great landscape/foliage colors, underexpose by a stop or two.  The colors will come out richer and you can lighten the picture a tiny bit in post production if need be.  Secondly, when shooting people in midday full sun, which I do not recommend doing but sometimes can not be avoided, you can overexpose them by a stop or two.  This will lighten their faces even with the sun on their backs.  One last tip.  If the overexposure isn’t enough because the sun is too strong and the subjects face is still too dark, turn on your flash…i know it seems counter intuitive to use your flash during the day but it will help to off set the suns harsh shadow on their face and give you a more even exposure.

533f2fc0bffa1de6121fedd02d1ac394

*It was noon at the lake that day, I overexposed by a stop and her face lit up beautifully.

83bc19af5f79e1639a8456eecac4447d

*Here, I underexposed by a stop and it pulled the depth of the moss on the wood and the sap on the pine cone.

Hope this helps a little!

XOXO

The Week We Almost Went Hungry

This week has gone by so quickly. I honestly have no idea what happened to it. To make matters worse, I did not manage to gather a weekly meal plan in any shape or form. To be honest, I am not even sure we ate. Although I feel like there may have been a package of Oreos amongst the haze that is the memory of this week. Apologetically this week I will not have a weeks worth of meals. I do however have at least one offering.

I was digging through the refrigerator desperate for some inspiration to hit. I found frozen chicken breasts, asparagus, the dredges of some cilantro and a single Pacifico beer. My first inclination was to just go to bed and give it all up as a bad week. That is when the light bulb turned on. I managed to eek out a little meal that allowed me to clear out the rest of the refrigerator so that we didn’t have any wasted food, and make something somewhat healthy for Kenny and I.

Cilantro to me is the defining flavor in south of the border cuisine. I know it turns up in many cultural dishes from around the world but to me, it will always be reminiscent of Latino culture. I decided to start there; I made a Cilantro and Lime Rice as a starting point. From there I moved to the chicken. I made a shredded Salsa Verde Chicken to accompany my rice. Finally I wanted to use up the last of my asparagus so I sautéed it with half a yellow onion in some olive oil. I piled up a good serving of rice; spooned some of the asparagus and onions, then topped it all off with the shredded chicken. I scooped up the whole bit with some corn tortillas and called it a night.


Shredded Salsa Verde Chicken

3-4 boneless skinless chicken breasts
1 jar of your favorite Salsa Verde
3-4 cloves garlic
1 bottle Pacifico (or your favorite lager beer)
salt
pepper
2 tablespoons cumin
1 teaspoon cayenne pepper

Directions:

Place chicken in a skillet and just cover with water. Salt and pepper the water and add garlic. Bring water to a boil. Once boiling reduce to a simmer and let cook covered for 15-20 minutes or until chicken is done. Drain liquid from pan.

Shred chicken with forks or remove from pan and put it into a stand mixer and shred using the paddle attachment for your mixer. Personally the mixer is so much faster and easier that I may never shred chicken by hand again.

Return Chicken to pan and add Pacifico, Salsa Verde, cumin and cayenne pepper. Salt and Pepper to taste. Bring pan to a light boil and then reduce to a simmer and allow to cook down. Approximately 20 minutes. Stirring occasionally but not too often.

Cilantro Lime Rice

3 cups water
1 1/2 cups water
tablespoon butter
1 teaspoon salt
1/2 bunch fresh cilantro
or
2 tablespoons cilantro paste
1-2 tablespoons lime juice

While chicken is being cooked down put on a three serving pot of rice to boil. Add butter, salt, cilantro and lime juice to the water. Bring pot to a boil. Once boiling reduce to simmer and let cook for 15 minutes.

While rice cooks and chicken reduces, heat a cast iron skillet with approximately 1 tablespoon of olive oil. Dice 1/2 a yellow onion and cut 1/2 bunch of asparagus into 1/2 inch pieces and add them both to a well heated skillet. Sauté until onions are translucent and soft. Allow the vegetables to sit a little longer than you would expect between stirrings. A little extra char on the vegetables adds a nice bit of flavor to the overall dish.

Once the vegetables have sautéed, the rice should be about done, Once the 15 minutes have elapsed give the rice a good fluff with a fork. Give the chicken one last good stir. You want there to be some liquid in the pan but you don’t want the chicken to be swimming either. If it needs a few extra minutes to evaporate plate up the rice and vegetables first.

Serve with a small stack of corn tortillas and your favorite hot sauce.

This recipe made enough for Kenny and I to both eat our fill. I was able to pack a good amount into a container for lunch the next day and there was still enough for Kenny to have his customary second and third plate.

Pasta Carbonara

Pasta really should be a food group. I know it doesn’t really fall into the gluten free, paleo, I wanna be able to fit into my pants category and truth be told I avoided it for years because of that exact reason. However I fell prey to the pasta siren song and hey, moderation in all things right?

A dear friend and colleague of mine holds two culinary degrees and an infinite knowledge of cooking is good about introducing me to things that I should already know about but somehow don’t. Pasta Carbonara for example. I have heard of it but I never really knew what it was until I was educated by my friend. Well, to make sure I don’t perpetuate this disastrous lack of information I am sharing the glory that is Pasta Carbonara with anyone who seeks it.

Pasta Carbonara

1 pound dry spaghetti
2 tablespoons extra-virgin olive oil
4 ounces pancetta or slab bacon, cubed or sliced into small strips
4 garlic cloves, finely chopped
2 large eggs
1 cup freshly grated Parmigiano-Reggiano, plus more for serving
Freshly ground black pepper
1 handful fresh flat-leaf parsley, chopped

Directions:

Prepare the sauce while the pasta is cooking to ensure that the spaghetti will be hot and ready when the sauce is finished; it is very important that the pasta is hot when adding the egg mixture, so that the heat of the pasta cooks the raw eggs in the sauce.

Bring a large pot of salted water to a boil, add the pasta and cook for 8 to 10 minutes which should bring them to the al dente stage.

Drain the pasta well, reserving 1/2 cup of the starchy cooking water to use in the sauce if you wish.

Meanwhile, heat the olive oil in a deep skillet over medium flame. Add the pancetta and saute for about 3 minutes, until the bacon is crisp and the fat is rendered. Toss the garlic into the fat and saute for less than 1 minute to soften.

Add the hot, drained spaghetti to the pan and toss for 2 minutes to coat the strands in the bacon fat. Beat the eggs and Parmesan together in a mixing bowl, stirring well to prevent lumps. Remove the pan from the heat and pour the egg/cheese mixture into the pasta, whisking quickly until the eggs thicken, be careful to not scramble (do this off the heat to ensure this does not happen.) Thin out the sauce with a bit of the reserved pasta water, until it reaches desired consistency. Season the carbonara with black pepper and salt to taste. Mound the spaghetti carbonara into warm serving bowls and garnish with chopped parsley. Pass cheese around the table for everyone to add more. Can you ever really have enough?

This recipe comes directly from Tyler Florence and The Food Network. To see the original post you can check it our here.